先回説明した「elfinder」非常に便利なのでサーバーをお持ちの方は是非使ってみてください。
ただし、簡単に設置できますがあくまで自己責任でお願いしますよ。
では実際のセットアップをご紹介します。①「elfinder」をダウンロードする必要があります。
リンクをたどり赤枠をクリックしダウンロードします。
この記事を書いている時点でのバージョンはelFinder-2.1.32でした。 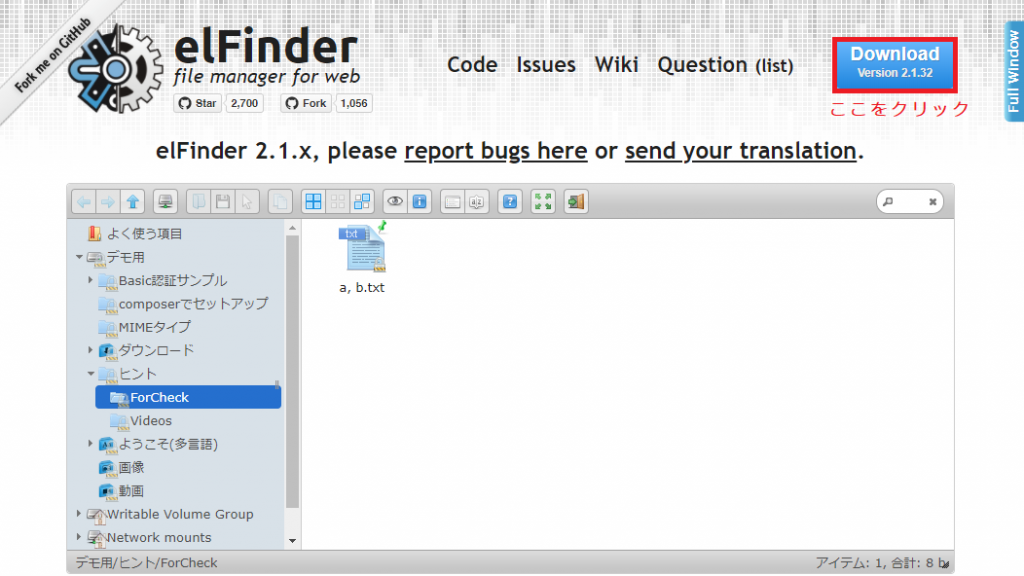
②ダウンロードしたら解凍します。 ③解凍後ほんの少しだけ設定項目があります。
phpフォルダの”connector.minimal.php-dist”の拡張子を”php-dist”から”php”に変更します。 ④拡張子を変更したらお気に入りのテキストエディタでこのファイルを開き104~126行目辺りにある赤字の2か所を書き換えます。 - 書き換え前 -
// Items volume
array(
‘driver’ => ‘LocalFileSystem’, // driver for accessing file system (REQUIRED)
‘path’ => ‘../files/’, // path to files (REQUIRED)
‘URL’ => dirname($_SERVER[‘PHP_SELF’]) . ‘/../files/’, // URL to files (REQUIRED)
‘trashHash’ => ‘t1_Lw’, // elFinder’s hash of trash folder
‘winHashFix’ => DIRECTORY_SEPARATOR !== ‘/’, // to make hash same to Linux one on windows too
‘uploadDeny’ => array(‘all’), // All Mimetypes not allowed to upload
‘uploadAllow’ => array(‘image’, ‘text/plain‘),// Mimetype `image` and `text/plain` allowed to upload
‘uploadOrder’ => array(‘deny’, ‘allow’), // allowed Mimetype `image` and `text/plain` only
‘accessControl’ => ‘access’ // disable and hide dot starting files (OPTIONAL)
),
// Trash volume
array(
‘id’ => ‘1’,
‘driver’ => ‘Trash’,
‘path’ => ‘../files/.trash/’,
‘tmbURL’ => dirname($_SERVER[‘PHP_SELF’]) . ‘/../files/.trash/.tmb/’,
‘winHashFix’ => DIRECTORY_SEPARATOR !== ‘/’, // to make hash same to Linux one on windows too
‘uploadDeny’ => array(‘all’), // Recomend the same settings as the original volume that uses the trash
‘uploadAllow’ => array(‘image’, ‘text/plain‘),// Same as above
‘uploadOrder’ => array(‘deny’, ‘allow’), // Same as above
‘accessControl’ => ‘access’, // Same as above - 書き換え後 -
// Items volume
array(
‘driver’ => ‘LocalFileSystem’, // driver for accessing file system (REQUIRED)
‘path’ => ‘../files/’, // path to files (REQUIRED)
‘URL’ => dirname($_SERVER[‘PHP_SELF’]) . ‘/../files/’, // URL to files (REQUIRED)
‘trashHash’ => ‘t1_Lw’, // elFinder’s hash of trash folder
‘winHashFix’ => DIRECTORY_SEPARATOR !== ‘/’, // to make hash same to Linux one on windows too
‘uploadDeny’ => array(‘all’), // All Mimetypes not allowed to upload
‘uploadAllow’ => array(‘all‘),// Mimetype `image` and `text/plain` allowed to upload
‘uploadOrder’ => array(‘deny’, ‘allow’), // allowed Mimetype `image` and `text/plain` only
‘accessControl’ => ‘access’ // disable and hide dot starting files (OPTIONAL)
),
// Trash volume
array(
‘id’ => ‘1’,
‘driver’ => ‘Trash’,
‘path’ => ‘../files/.trash/’,
‘tmbURL’ => dirname($_SERVER[‘PHP_SELF’]) . ‘/../files/.trash/.tmb/’,
‘winHashFix’ => DIRECTORY_SEPARATOR !== ‘/’, // to make hash same to Linux one on windows too
‘uploadDeny’ => array(‘all’), // Recomend the same settings as the original volume that uses the trash
‘uploadAllow’ => array(‘all‘),// Same as above
‘uploadOrder’ => array(‘deny’, ‘allow’), // Same as above
‘accessControl’ => ‘access’, // Same as above 「‘image’, ‘text/plain’」部分を「‘all’」に書き換えますが
上段の// Items volumeの項目はデフォルトではアップロードできるファイルが画像とテキストファイルに制限ているのでその制限を「‘all’」にすることで外しています。
また、下段の// Trash volumeの項目ではゴミ箱に捨てることのできるファイルが画像とテキストファイルに制限ているのでその制限を「‘all’」にすることで外しています。 ⑤解凍してできたelFinder-2.1.32フォルダをそのままコピーしてサーバーの外部からアクセスできる場所に設置します。
この際フォルダの名称は自身の自由に書き換えてください。 たったこれだけで設定は終了。
あとはブラウザで接続できるか確認してみてください。
何ともあっさり繋がってしまいます。
私の環境ではこのままで日本語表記でき特に不具合は見つかりませんでした。 これに.htaccessと.htpasswdを使ってBASIC認証を組込めばいとも簡単にメンバー専用のクラウドができちゃいます。 では、実際に使ってみます。
ブラウザでアクセスしファイルをドラグ&ドロップしてみましょう。 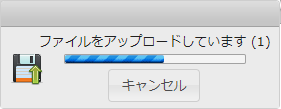
アップされたデーターは設置したフォルダの中にあるfilesと言うフォルダに保存されます。
もし、サーバーがネットワーク共有されているならばこのfilesフォルダを共有してみてください。
そうすればネットワーク越しにファイルの出し入れが簡単にできます。
複数の拠点があるのならfilesを共有する際に共有名を変えてやらないといけません。 | 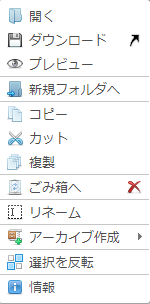 ファイル右クリックのメニュー ファイル右クリックのメニュー
|  フォルダー内右クリックのメニュー フォルダー内右クリックのメニュー
| うちの事務所の場合、このWebサーバーが稼働しているドライブをさらに別ドライブにバックアップしているので万一の際もデーターが欠落することなく運用できるよう心掛けています。
それと、フォルダを監視するアプリが入れてあり特定のフォルダ内のファイルに変化が起きると各担当スタッフ宛にメールが飛ぶようにしてあります。
こうする事で、取引先などからのファイル保存に即応性が優れた対応ができるようなシステムを構築しています。 いかがでしたか?
Webサーバーなんて古いマシンを使いXammpを入れれば簡単に構築できる時代です。
お仕事でファイルを扱う商売の方ちょっと考えてみてはいかがでしょう。 |
 【実録】「2年越しの毒電波を克服」魔改造B-CASカード販売メールの正体——6/17新KW対応版と称しYandex経由で届く違法勧誘の全手口を公開
  【注意喚起】経済産業省・資源エネルギー庁「電気・ガス補助金失効通知」は詐欺!SPF認証失敗の不正メールがVポイント詐欺と同じ誘導先を使用
  【続報】国勢調査2026「罰則適用前最終通知」詐欺が一新——イタリア発送・スマホ限定の偽サイトでクローキングを実装
  【解析】e+plus「決済システム更新のご案内」は詐欺!韓国発Azure×ゼロ幅文字注入×二重ドメイン「.com.com」の新手口
  【警告】NHK「受信料契約者限定 視聴者還元のご案内」は偽物!5000円ギフト券で釣るフィッシング詐欺を解析